7 Simple Ways to Secure Insulation Around Outdoor Pipes (Without Wrecking Your Curb Appeal)
By Turfrain
To secure insulation around outdoor pipes, choose closed-cell foam or rubber sleeves rated for exterior use, seal every seam with UV-resistant tape or zip ties, and weatherproof with a waterproof wrap. Focus on hose bibs, backflow preventers, and exposed sprinkler lines. Finish with a rigid cover or box to block sun, wind, and pests.
What you’ll learn from this blog
The quickest way to insulate and secure exposed outdoor pipes
Which materials actually hold up in sun, rain, and freeze-thaw cycles
How to protect hose bibs, backflow preventers, and sprinkler lines
Step-by-step instructions you can finish in an afternoon
Seasonal maintenance tips to keep insulation from slipping or soaking
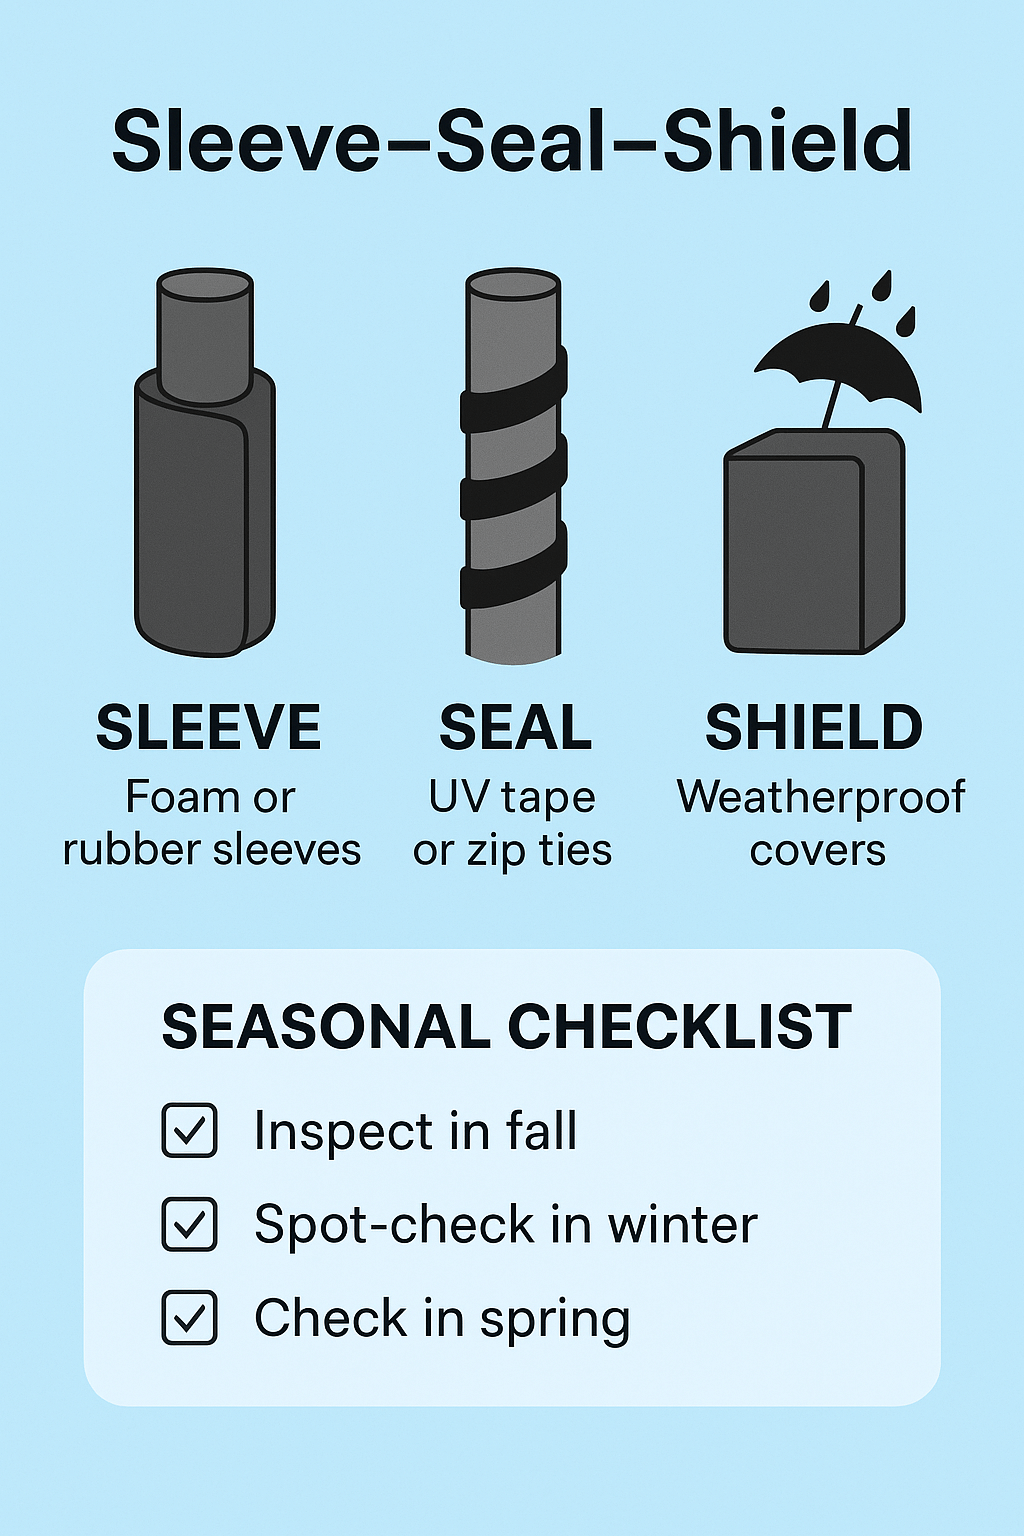
The 10-Minute Fix: Sleeve, Seal, Shield
If you do nothing else, do this. It’s the fastest way to stop wind, sun, and ice from beating up your pipes—and yes, it looks tidy.
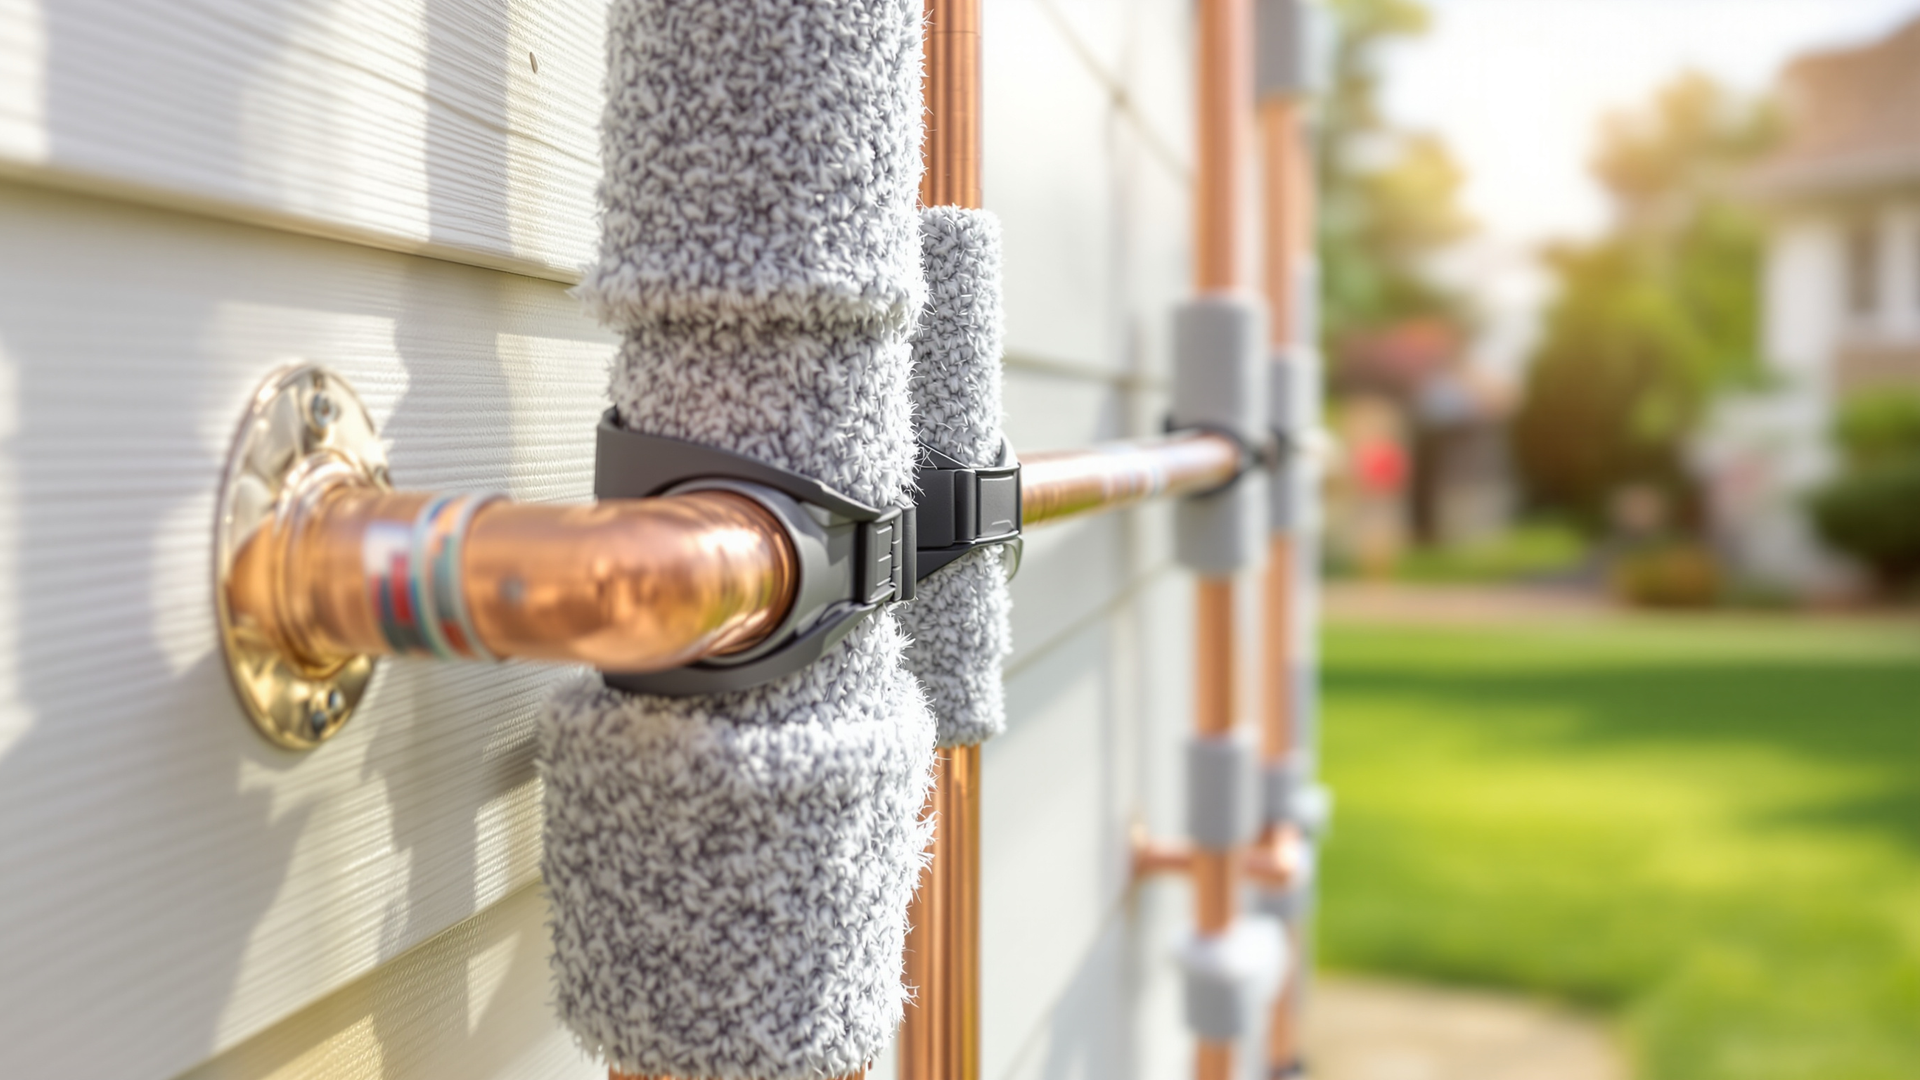
Sleeve: Fit closed-cell foam or rubber pipe insulation snugly around the pipe. Pick the exact diameter so it grips without gaps.
Seal: Spiral-wrap seams with UV-resistant tape or use black UV-rated zip ties every 8–12 inches.
Shield: Add a waterproof jacket or slip on an insulated cover (especially for hose bibs and backflow preventers).
A quick example: A homeowner in a high-sun yard wrapped only with foam one fall. By spring, the foam had chalked and split. The fix? Same foam, but sealed with self-fusing silicone tape and covered with an insulated box. Two winters later, still solid—and better looking.
Choose Materials That Actually Last Outside
The best insulation fails fast if you pick the wrong wrap. Here’s how to choose gear that survives the elements.
Insulation type: Look for closed-cell foam or EPDM/nitrile rubber sleeves labeled exterior/UV-resistant. For freeze protection, 3/8" to 3/4" thick is common—thicker slows heat loss more.
Tape options (what works outdoors):
Self-fusing silicone tape: waterproof, flexible, UV-stable, great for ends/seams.
Butyl rubber mastic tape: adds a weatherproof layer; top with a UV tape if needed.
UV-rated pipe wrap tape: acrylic adhesive, black or white, built for sun.
Fasteners: Use black UV-rated zip ties or stainless steel clamps; avoid clear/white ties that turn brittle.
Jackets and covers: PVC jacketing or pre-made insulated bib/backflow covers keep sun and rain off the foam. If it looks like a mini-coat, that’s good.
Long-tail answer you’re probably asking: What’s the best tape for foam pipe insulation outdoors? Self-fusing silicone for waterproofing + UV-rated wrap for longevity. It’s a tag team.
Tackle Lawn Trouble Spots Like a Pro
Your lawn hides the tricky stuff. Don’t let those parts be the weak link.
Hose bibs and wall spigots: Slide on a foam sleeve, seal seams, then cover with a fitted insulated faucet cover. If you often use the faucet, choose a cover with quick clips so you won’t “set it and forget it” forever.
Backflow preventers (PVB/RPZ) and vacuum breakers: These sit high, catch wind, and freeze first. Use foam or rubber sleeves on exposed copper/bronze, seal with silicone tape, then add a weatherproof insulated cover box sized for the assembly. Leave room for airflow and service; follow local code for accessibility.
Exposed sprinkler risers and supply lines: Wrap vertical PVC risers with foam, spiral-seal, and protect with a rigid sleeve or decorative cover. For horizontal runs near grade, insulation helps a bit—but proper winterization (blowing out lines) matters more.
Pool equipment and filters: Insulate exposed water lines and valves; for complex layouts, use removable jackets so you can service gear without cutting tape.
Keep Water Out and Critters Away
Water sneaking under insulation ruins everything. So does a nosy squirrel.
Create a drip path: Seal the top thoroughly; at the bottom, wrap tight but don’t trap water. You want any sneaky moisture to escape downward.
Cap ends smartly: Use silicone tape to finish ends; back it up with a short length of PVC jacket or a cap to stop UV.
Avoid gaps at fittings: For elbows and tees, use pre-formed corner pieces or slice foam at a 45° and tape the miter. Quick fix, snug look.
Critter-proofing: If you’ve got chewers, add a thin PVC jacket or a decorative cover over foam. It’s like putting a vest over a sweater.
Your Seasonal Checklist (Fast and Doable)
Fall: Inspect, replace chalky foam, retape seams, and add covers. Blow out sprinkler lines if you freeze.
Winter: After a cold snap, spot-check for loose ties and torn tape.
Spring: Make sure insulation didn’t soak; dry or replace any spongey sections.
Summer: UV check—if it’s faded and flaky, renew the wrap or add a jacket.
When to Call a Pro (And Save Yourself a Saturday)
If you’re dealing with complex backflow assemblies, weird pipe sizes, or you just want a clean, “done-once-done-right” setup, bring in help. A pro can spec the right insulation thickness, install durable jackets, and set you up with an irrigation winterization routine—so you’re not guessing when the first cold front hits.
Conclusion and Call-to-Action
Securing insulation around outdoor pipes is a sleeve-seal-shield job you can knock out in an afternoon—and your lawn plumbing will thank you when that first freeze rolls in. If you want it handled neatly and code-smart, Turfrain is here to help with irrigation protection, insulated covers, and seasonal tune-ups. Have questions or want a quick quote? Contact Us—let’s make winter a non-event.