At What Temperature Should I Start Winterizing My Valve? A No-Stress Guide for Homeowners
By Turfrain
Start winterizing your valve when overnight lows consistently dip to 36–38°F (2–3°C), and finish before the first hard freeze of 28°F (-2°C) for several hours. That buffer prevents trapped water from expanding and cracking sprinkler valves, backflow preventers, and fittings. If a frost advisory is issued, move now—earlier is always safer than one surprise freeze.
What you’ll learn from this blog
The exact temperature to start winterizing your valve (and why)
How regional weather changes your timing
A simple step-by-step winterization checklist you can follow today
Backflow preventer and above-ground valve protection tips
What to do in mild climates where freezes are rare
When it’s smarter (and cheaper) to call a pro
The short answer, plus your local weather reality
The trigger temperature: Start at 36–38°F overnight lows, not 32°F. That cushion accounts for radiative cooling and microclimates that can freeze hardware even when the forecast says “above freezing.”
The hard stop: Be fully winterized before a hard freeze (28°F for several hours).
Regional rhythm:
Colder climates: Plan for early-to-mid fall—often late September to mid-October.
Transitional zones: Late October to early November is common.
Mild climates: Have a quick-drain/insulation plan ready for cold snaps; winterize temporarily when freezes are forecast.
Practical cue: Two consecutive nights forecast below 36°F or the first frost/hard freeze advisory—go.
Why this 36–38°F window matters (and how pipes actually freeze)
Water doesn’t need a long time at 32°F to cause headaches. Thin brass in backflow preventers and plastic valve bodies cool fast. Picture a soda can left in a freezer “just for a minute”—you think it’s fine… until it isn’t. I once saw a pristine backflow split overnight at 30°F because the owner waited for “real winter.” The repair cost more than a full season of pro blowouts.
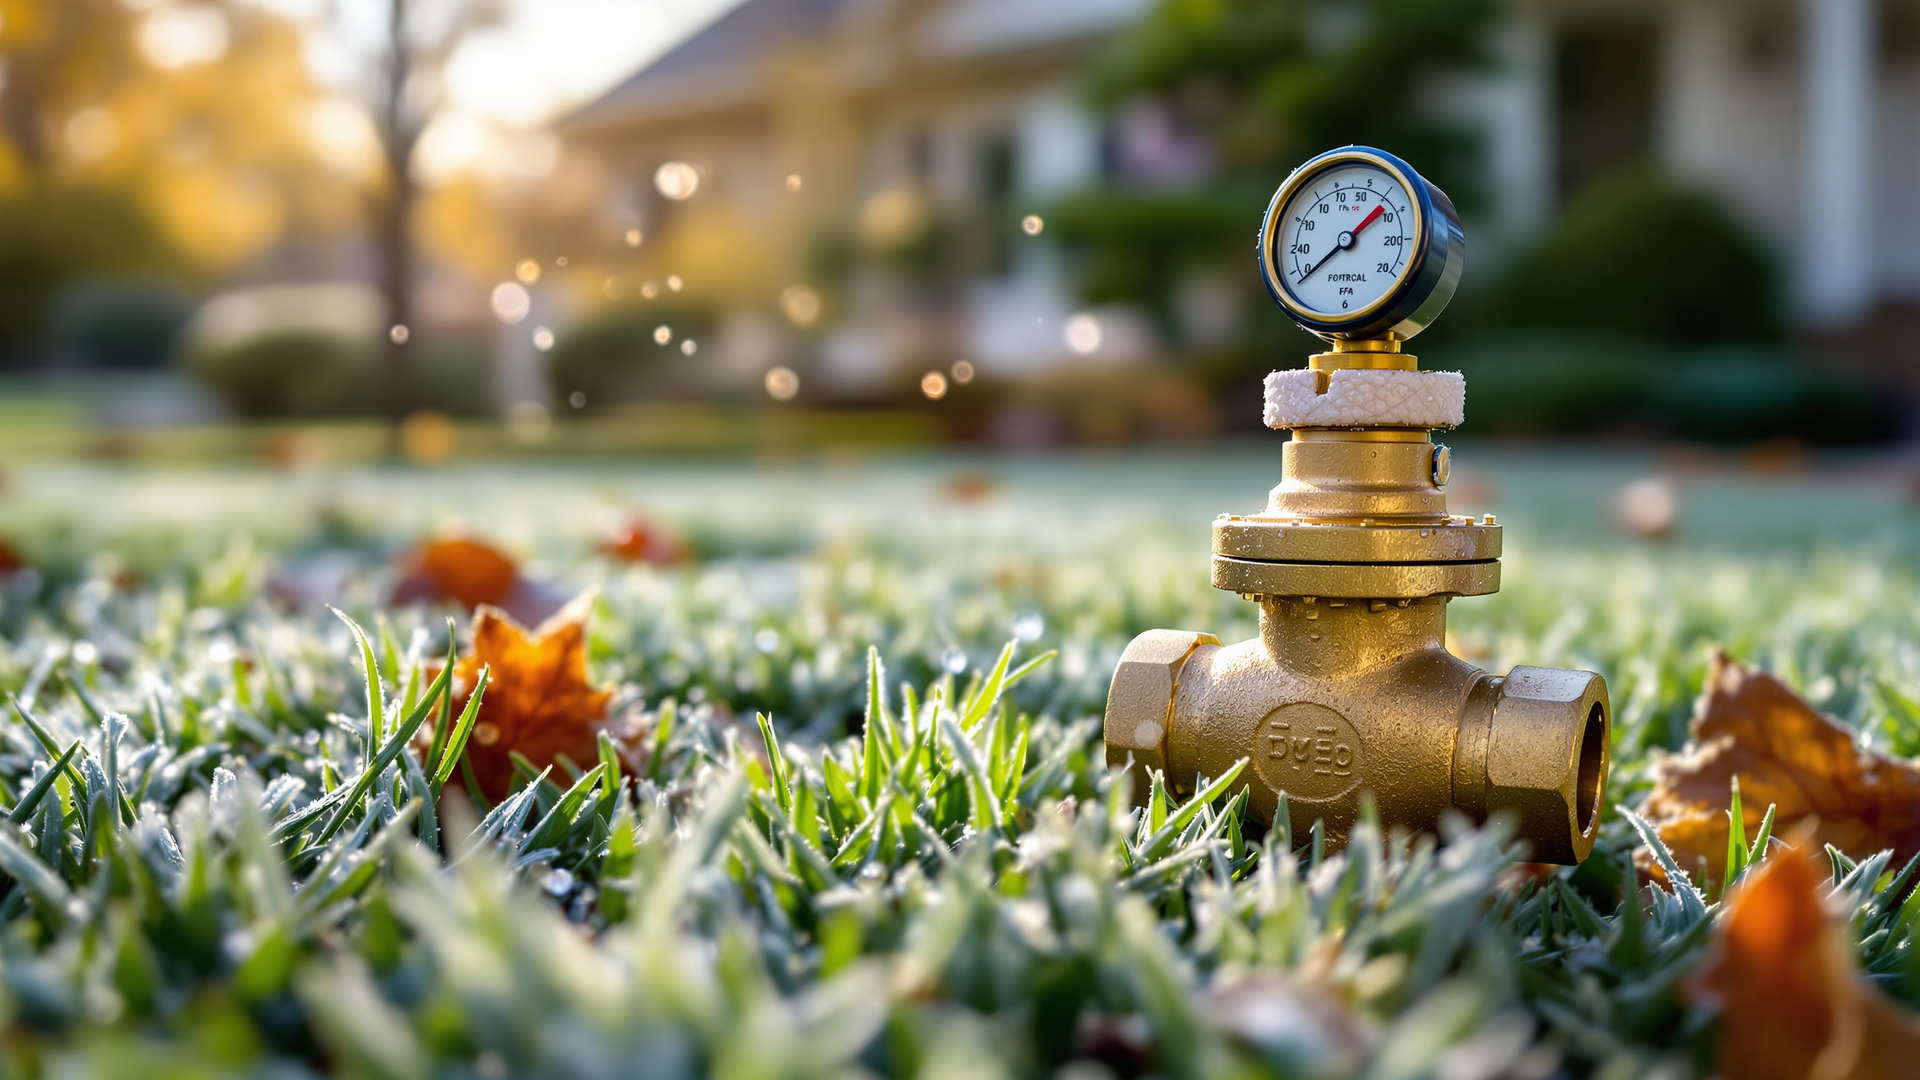
Above-ground components lose heat quickly: backflows, exposed valves, and vacuum breakers are first to fail.
Buried lines are slower to freeze—but trapped water near fittings expands and cracks threads and bodies.
Early action buys time: insulating, draining, and blowing out lines before that first hard freeze avoids emergency repairs.
A quick homeowner checklist to winterize sprinkler valves
If you like a simple path, here’s your step-by-step. You can do most of this in under an hour.
Shut off the irrigation water supply at the main irrigation shutoff (usually before the backflow preventer).
Open manual drain valves or test cocks on the backflow preventer to relieve pressure and let water escape.
Set your controller to “Off” or “Rain Mode.” Consider running each zone for 30–60 seconds first to push water toward low points.
Blow out lines if your system requires it:
Use an air compressor with a regulator and a proper connection to the blowout port.
Pressure guidelines (general, always follow your system’s specs):
Spray zones: 40–50 PSI
Rotor zones: 50–60 PSI
Drip: 25–30 PSI
Cycle each zone in short bursts (30–90 seconds) until a light mist appears. Don’t hold constant high-pressure air—heat can damage components.
If you’re unsure, hire a pro. A too-strong compressor can melt internals; a too-weak one won’t clear water.
Insulate exposed hardware:
Wrap the backflow preventer and any above-ground valves with insulation covers or foam plus a weatherproof jacket. Leave test cocks slightly open under the cover so any remaining moisture can vent.
Tag it for spring:
Label the shutoff, backflow, and controller with a simple “next spring” note so you remember settings and sequence.
Special cases: backflows, drip, and mild climates
Backflow preventers (RPZ, PVB, DCVA): These are the “canary in the coal mine.” If nothing else, protect these first. A 20insulationbagcansavea300–$900 replacement.
Drip irrigation: More forgiving, but the emitters and filters can crack. Quick-drain and lower PSI blowouts are ideal.
Hose bibs and quick-connects: Disconnect hoses, drain, and add insulated covers—yes, even if the bibs are “frost-free.”
Well and pump houses: Add a heat source set to kick in at 38–40°F and check door seals. A $15 thermometer with alerts can be a hero during a cold snap.
Mild-climate moves: Keep insulating covers on hand, learn where your shutoff is, and use temporary blowouts for cold snaps. You might winterize only during freeze events rather than for the entire season.
Make it effortless next year (so you don’t even think about it)
Put reminders in your phone: one at the first fall frost average for your ZIP code, and one week earlier as a buffer.
Add a freeze alert: Many smart controllers and weather apps can ping you at 38°F forecasts.
Install a proper blowout port and labeled shutoff. Future-you will be grateful.
Consider a pro plan: One scheduled visit for winterization is cheaper than a mid-winter emergency call—by a lot.
Conclusion and a friendly nudge
You don’t need to wait for a snowstorm. Start winterizing your valve when nights hit 36–38°F, wrap the vulnerable bits, and beat that first hard freeze. If you want a no-guess, no-stress experience, Turfrain can handle the whole thing—from blowouts to backflow protection—so you can sip cocoa instead of wrestling with fittings. Contact Us and we’ll get you winter-ready, fast.