DIY Winterization: Pros and Cons Every Lawn-Loving Homeowner Should Know
By Turfrain
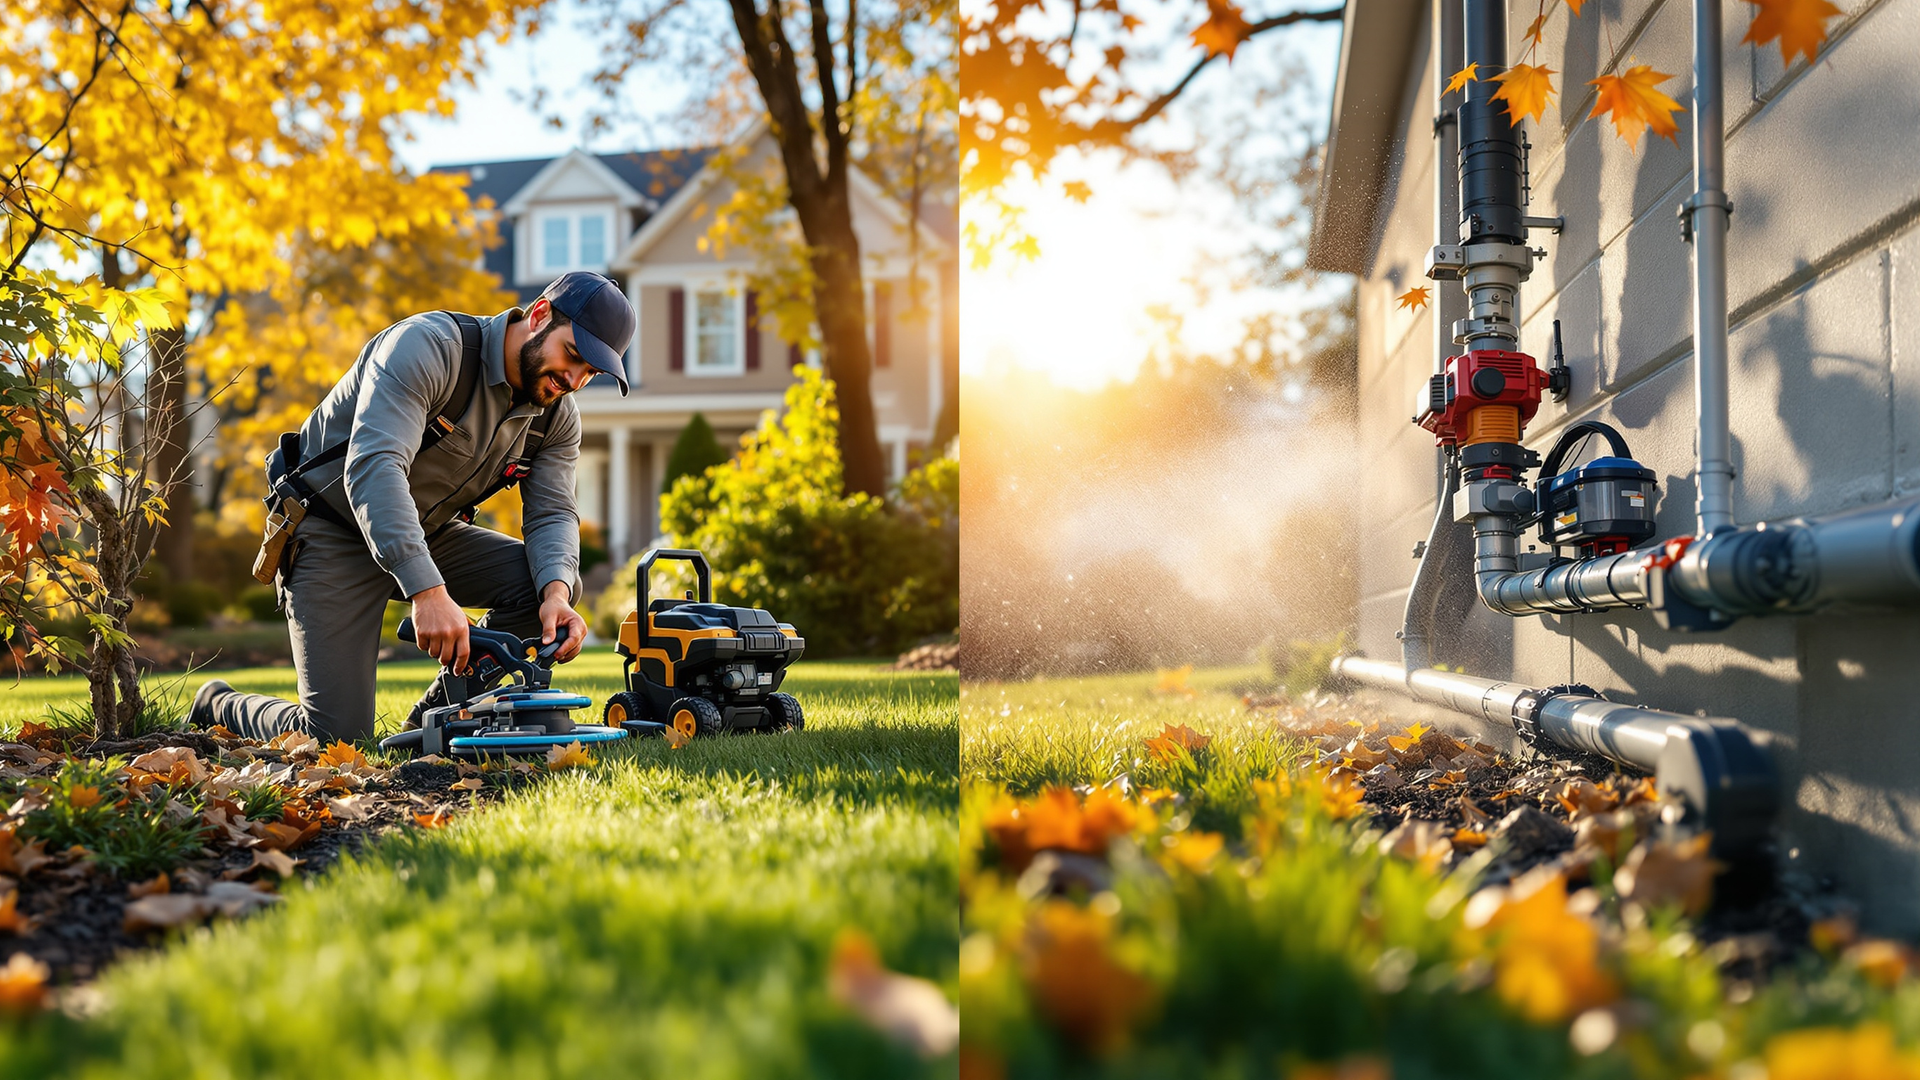
DIY winterization can save money and give you control over your lawn’s prep for cold weather, but it comes with risks. You might miss water in sprinkler lines, mis-time fertilizer, or overlook hose bibs—leading to burst pipes, lawn stress, or safety issues. If you’re careful and equipped, it’s doable; if not, hiring helps.
What you’ll learn from this blog
Real-world pros and cons of DIY winterization for lawns and sprinklers
Cost comparisons vs. hiring a pro (and hidden pitfalls)
Timing tips to avoid freeze damage
Tools and safety basics that actually matter
A simple rule to decide: DIY or call a pro
The big money question: Save now, or risk paying later?
Summary: DIY winterization can cost less upfront, but mistakes get expensive fast.
Details: Blowing out a sprinkler system yourself might run 40–70 for a compressor rental and an hour or two of your time. Hiring a pro? Often 80–150. But a cracked backflow or burst lateral line can cost 200–800+ to repair. Overdo fertilizer or apply at the wrong time and you can stress turf, spending spring reseeding instead of relaxing. It’s a small bet with big odds—worth it if you’re confident and careful.
Timing is a tight window (and the weather can be sneaky)
Summary: Winterize before the first hard freeze, not after the frost bites.
Details: A neighbor of mine waited “one more week” because the forecast looked mild. A surprise cold snap hit 22°F overnight; his vacuum breaker split like an eggshell. Aim to winterize sprinklers when nights start dipping below the mid-30s and before sustained freezes. For lawns, late-fall “winterizer” fertilizer (high potassium, slow release) goes down when grass is still green and growing slowly, not after it’s fully dormant.
Quick timing check (5-minute plan):
Look at 10-day lows: two or more nights at or below 32°F? Move now.
Ground temp near 40–50°F? Good for a final winterizer application.
Leaves piling up? Clear them so turf can breathe through winter.
Tools and technique: Are you set up for success?
Summary: The right setup beats guesswork—especially with sprinklers.
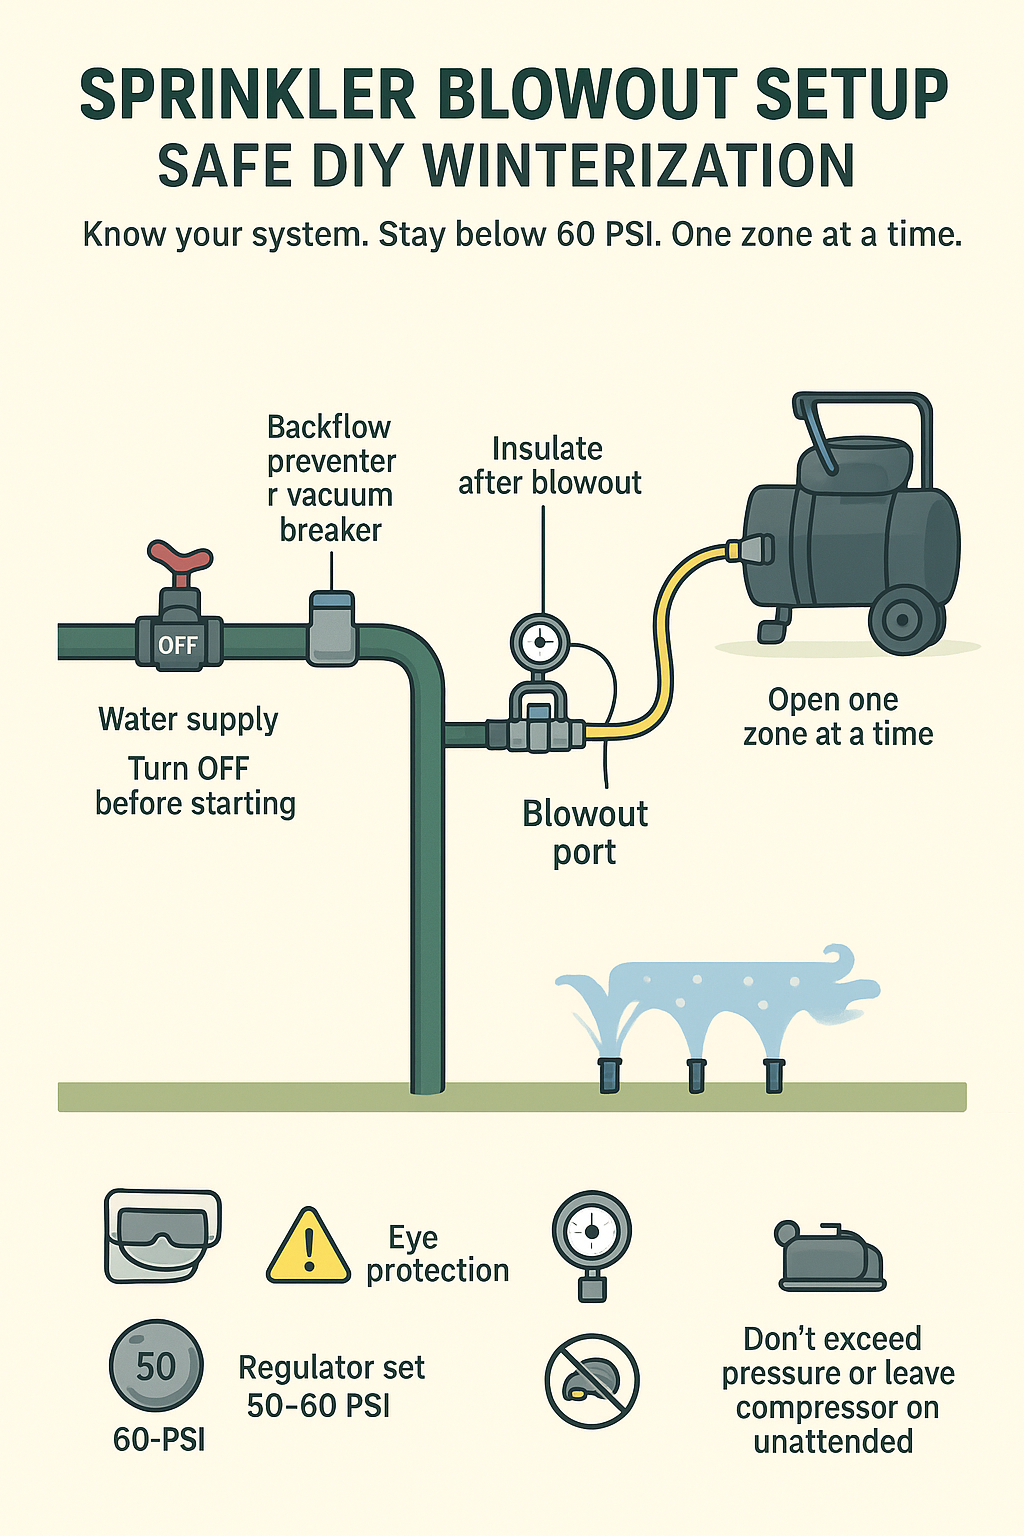
Details: For DIY sprinkler blowouts, you’ll want a compressor that can deliver adequate CFM (volume), not just PSI. Most systems clear safely around 50–60 PSI with proper flow; too little airflow leaves water behind, too much pressure risks damage. Use eye protection, open zones one at a time, keep bursts short, and never leave the compressor unattended. Pancake compressors struggle; a contractor or tow-behind unit makes the job both faster and safer.
Step-by-step sprinkler blowout (zone-by-zone):
Shut off water supply to the irrigation system.
Connect compressor to the blowout port with a proper fitting.
Set regulator to around 50–60 PSI (or the manufacturer’s spec).
Open one zone; run short bursts until mist turns to air.
Cycle each zone; include drip lines if you have them.
Leave valves slightly open for expansion; insulate exposed backflow parts.
Lawn extras you’ll DIY well:
Final mow a bit lower than summer (about 2.5–3 inches).
Rake or mulch leaves to prevent matting and snow mold.
Disconnect hoses and drain hose bibs; install covers if needed.
Details: Doing it yourself means you choose the day, the products, and the pressure settings. You learn your system’s quirks and—honestly—there’s real satisfaction in that. On the flip side, pros often provide warranties, carry insurance, and spot issues (like a slow weep at the backflow) before they become spring disasters. Plus, reputable companies document the blowout for your records.
A simple rule of thumb: When to DIY, when to call a pro
DIY is a good fit if:
You’re comfortable with tools and follow instructions.
You can access a compressor with enough CFM.
Your system is simple (few zones, minimal elevation changes).
You’ve got time to watch the weather and work safely.
Hire a pro if:
You’ve got a large or complex system, drip zones, or well/pump.
You lack the right equipment or aren’t sure on settings.
You want a warranty or proof for your records (handy for HOAs or resale).
You’ve had freeze damage before and don’t want a repeat.
Wrapping it up (and keeping your lawn happy)
DIY winterization can absolutely work for homeowners with lawns—especially if you’ve got the gear, the time, and a careful streak. But if you’re even a little unsure, a quick professional visit is cheaper than a springtime repair. Want a no-stress season? Contact Us at Turfrain, and we’ll winterize your sprinklers and set your lawn up to wake green and ready. Ready to hand it off to a pro? Check out our next blog: “Find a Reliable Service Provider for Your Lawn.”