The Best Materials to Protect Outdoor Valves from Freezing (Without Overcomplicating Winter Prep)
By Turfrain
Yes—use closed-cell foam pipe insulation, insulated valve/backflow covers, and a self-regulating heat cable rated for wet locations. Add a weatherproof outer wrap (UV-resistant tape or vinyl) and seal gaps against wind. In very cold zones, use an insulated enclosure box. Keep insulation dry with a vapor barrier so it actually works.
What you’ll learn from this blog
The top materials that actually keep outdoor valves from freezing
How to pick the right combo for your climate and valve type
A quick, step-by-step installation game plan
Common mistakes that cause freeze-ups (and how to dodge them)
Budget-friendly tips and when to upgrade to premium solutions
The winning combo: foam plus a smart heat cable
If you want the most reliable setup for outdoor valves—hose bibs, irrigation valves, or a backflow preventer—pair closed-cell foam insulation with a self-regulating heat cable. The foam slows heat loss; the cable kicks on only when temps drop. It’s like a warm jacket with a built-in thermostat.
Quick snapshot:
Closed-cell foam pipe insulation: Great R-value, easy to cut and fit.
Self-regulating heat cable: Adjusts output as it gets colder, safer and more efficient than constant-wattage types for most homeowners.
Weatherproof wrap: UV-resistant tape or vinyl to keep everything dry and snug.
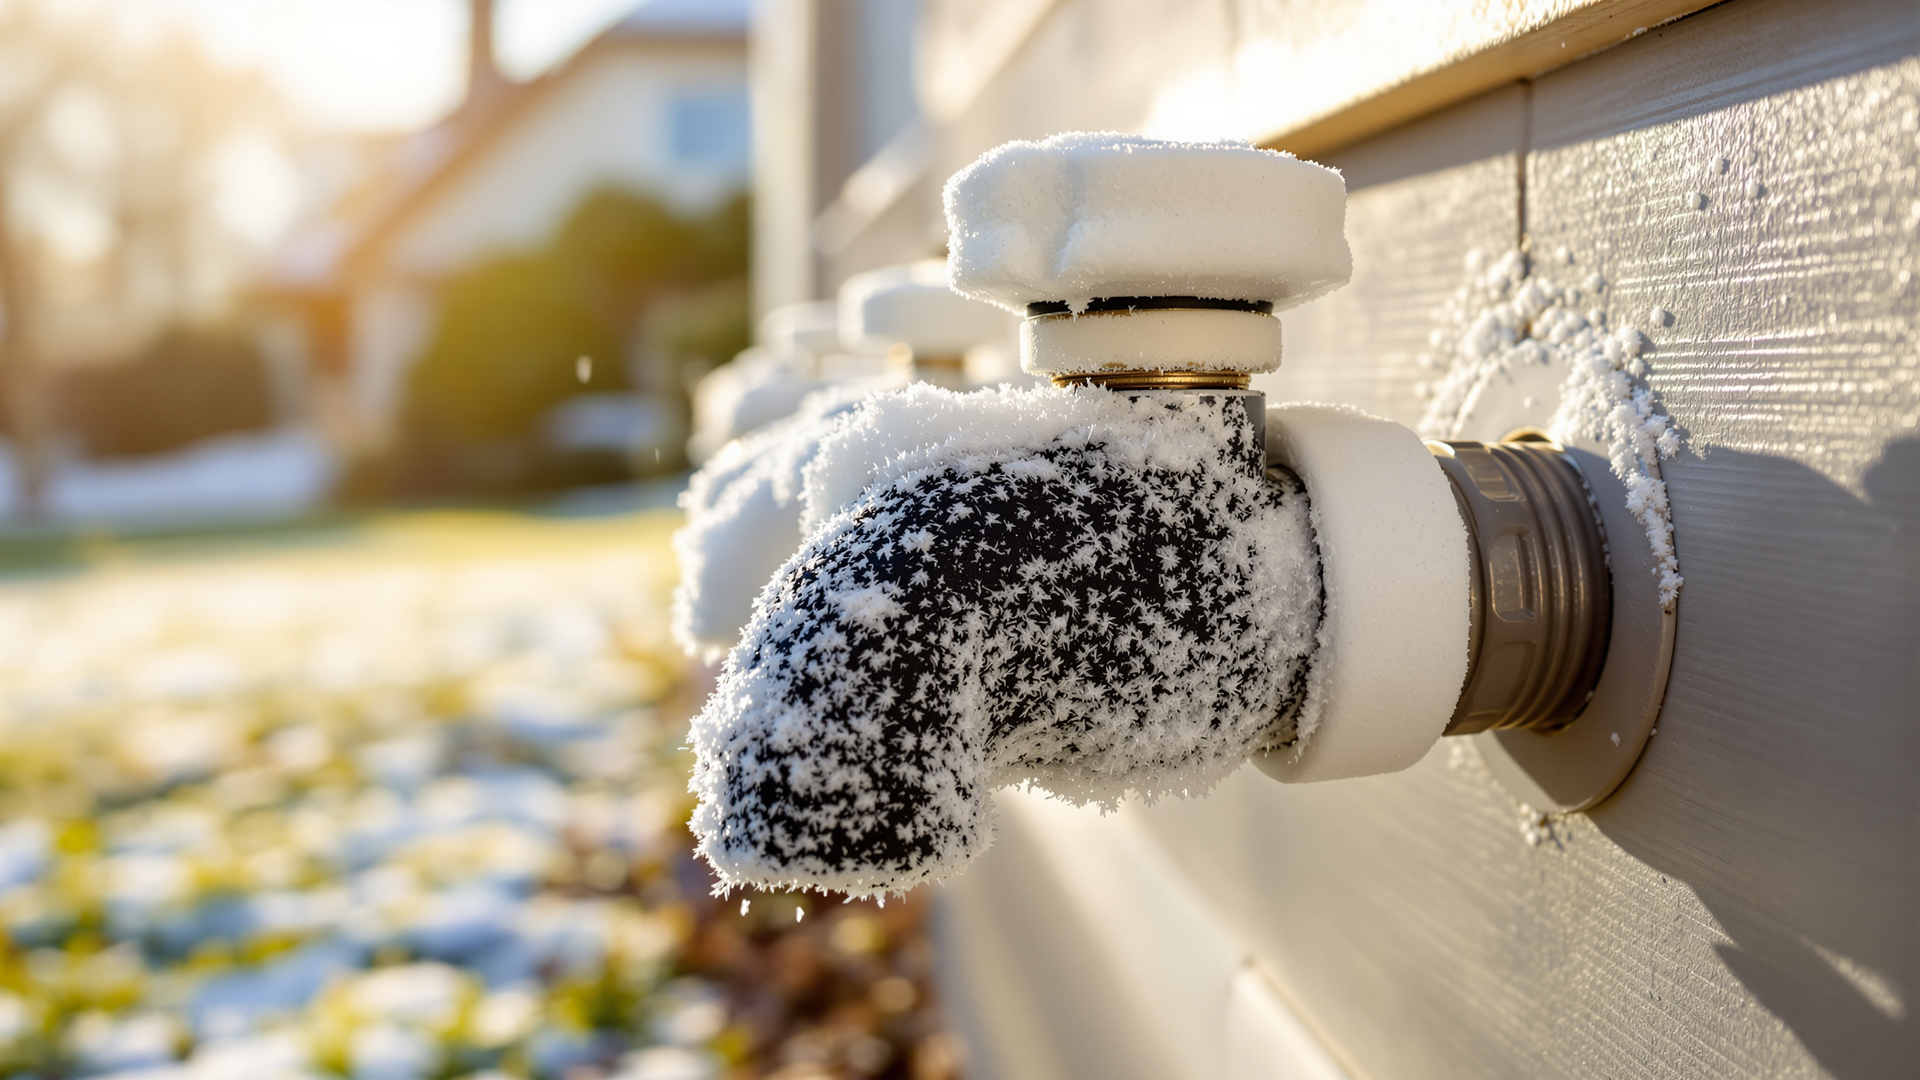
Anecdote: Last winter, a neighbor wrapped their backflow in a towel and a trash bag (we’ve all been there). It froze solid after a windy 18°F night. We redid it with foam, a heat cable, and a proper insulated cover. No issues the rest of the season—even during a cold snap with 30 mph gusts.
Know your materials (and why they work)
Not all “insulation” behaves the same in freezing, wet weather. Here’s what earns its keep:
Closed-cell foam pipe insulation: Best first layer. It resists moisture, maintains R-value, and cushions against light impact. Look for UV-resistant or add a protective wrap if exposed to sun.
Insulated valve covers/backflow blankets: Molded foam hose-bib covers and zip-on backflow covers trap air and reduce wind chill. Choose ones with a firm shell and enough depth to cover fittings and fasteners.
Fiberglass wrap with vapor barrier: High insulating value, but only if it stays dry. If you use it, finish with a tight, sealed vapor barrier (plastic or foil) and an outer weatherproof wrap.
Self-regulating heat cable (a.k.a. heat tape): Only use cables rated for water pipes and outdoor/wet locations, and plug into a GFCI outlet. Run it along the valve body and pipe, then insulate over it.
Weatherproof outer wrap: UV-resistant vinyl, rubberized tape, or heavy-duty duct tape keeps insulation dry and blocks wind infiltration.
Insulated enclosures/boxes: For multi-valve manifolds or exposed backflow preventers, an insulated, lockable box adds both freeze protection and security.
Long-story-short? Moisture ruins insulation. Keep the inner layers dry with a vapor barrier and a tough outer wrap.
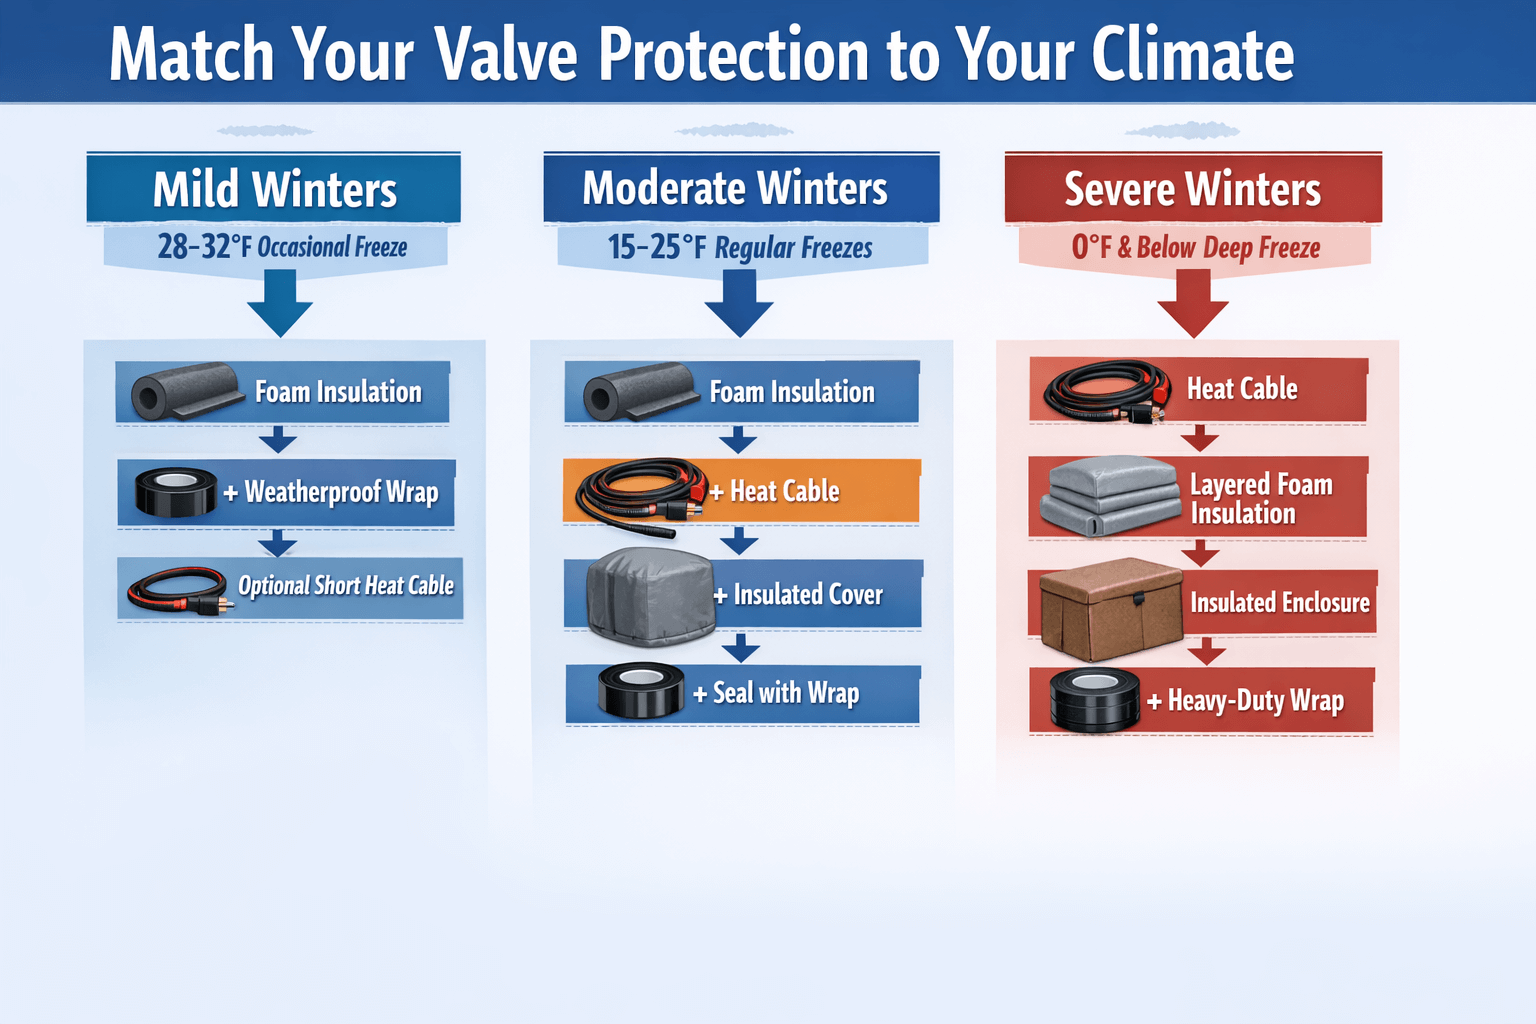
Match the material to your valve and climate
Let’s pick the right setup without guesswork.
Mild winters (occasional dips to 28–32°F)
Hose bibs: Foam cover + weatherproof wrap. Optional short heat cable if north-facing or windy.
Irrigation/backflow: Insulated backflow cover with foam inside. Seal gaps.
Bonus: Shut off water to exterior lines and drain when possible.
Moderate winters (teens to 20s°F, regular freezes)
Add wind baffles or a simple shield if the area is exposed.
Step-by-step: Wrap a backflow preventer the right way
Turn off and drain: Shut the irrigation supply if possible; crack test cocks to drain residual water.
Run the heat cable: Follow the manufacturer’s spacing, covering the valve body and exposed pipes. Plug into a GFCI.
Add foam insulation: Use closed-cell foam or pre-slit wrap; avoid compressing the cable.
Seal with a vapor barrier: Plastic or foil tape to keep moisture out.
Cover it up: Slide on an insulated backflow cover or set an insulated box over the assembly.
Weatherproof the seams: Use UV-resistant tape; leave a small weep point at the bottom to prevent trapped moisture.
Common mistakes that cause freeze-ups (ask me how I know…)
Gaps and wind tunnels: Even “warm” insulation fails if wind sneaks in. Seal edges and seams.
Wet insulation: Fiberglass or open-cell foam becomes useless when damp. Use vapor barriers and proper wraps.
Wrong heat cable: Not rated for wet locations? No GFCI? That’s a safety and reliability risk.
Over-compression: Crushing foam reduces R-value. Snug, not tight.
Forgetting to drain: Valves can still burst if water is trapped. Drain when you can.
UV damage: Sun chews up exposed foam. Add a UV-resistant outer layer.
A quick buying checklist (and ballpark costs)
Closed-cell foam sleeves: 1–3 per foot (thicker is better).
Hose-bib/valve covers: 6–20 each; choose sturdy shells with good fit.
Backflow covers/blankets: 40–200 depending on size and insulation rating.
Self-regulating heat cable: 4–10 per foot; look for a built-in thermostat or self-reg feature.
Weatherproof tape/wrap: 8–25; choose UV-resistant products rated for outdoor use.
Insulated enclosures/boxes: 100–400; great for multi-valve manifolds and exposed assemblies.
In short: the best materials for protecting outdoor valves from freezing are closed-cell foam, insulated covers or enclosures, a self-regulating heat cable, and a weatherproof wrap to keep it all dry and wind-tight. Layer smart, seal gaps, and match the setup to your climate.
Conclusion and a friendly nudge
You don’t need a plumbing degree to outsmart winter—just the right layers and a little care. If you’d like help picking materials or want it installed the right way the first time, Turfrain is here for you. Contact Us and let’s keep your valves (and your lawn’s irrigation) safe all season.